Setting up Google Workspace for email requires precise DNS configuration. Without it, your emails may land in spam or fail to send. Here's what you need to know:
For businesses managing multiple domains, automation tools like Primeforge can streamline DNS setup, reducing errors and saving time. Proper configuration ensures better deliverability, strengthens domain security, and protects against spoofing.
Before diving into DNS configuration, make sure you have a verified domain and access to your registrar's control panel. Without these, you won’t be able to make the necessary changes to ensure your emails are routed properly through Google Workspace. These initial steps are essential for setting up email routing, as explained earlier.
Start by securing an active Google Workspace account and full admin access to your domain registrar. This means having the login credentials for platforms like GoDaddy, Namecheap, Cloudflare, or whichever service you used to purchase your domain. If you’re unsure where your domain is registered, check your purchase confirmation email or use a WHOIS lookup tool.
It’s also a good idea to back up your current DNS records. This backup acts as a safety net, allowing you to restore your settings quickly if something goes wrong. Once you’ve got these basics covered, you’re ready to move on to verifying your domain ownership.
To verify your domain, you’ll need to add a TXT verification record provided by Google.
Here’s how to do it:
google-site-verification=...).Keep in mind that DNS changes can take anywhere from 1 to 48 hours to propagate, though it’s often much quicker. To check the status, you can use tools like Google’s Admin Toolbox or command-line utilities such as dig.
Once domain verification is underway, the next step is accessing your registrar’s DNS management section to add the remaining records. Although the specifics vary slightly between providers, the general process is similar.
For GoDaddy, log in at godaddy.com, navigate to My Products > Domain > DNS > Manage Zones. If you’re using Cloudflare, sign in at dash.cloudflare.com, select your domain, and go to the DNS tab > Add Record. Look for sections labeled "DNS Management", "Zone Editor", or "Advanced DNS."
To keep your account secure, enable two-factor authentication if your registrar offers it. Before making any changes, review your existing DNS records carefully. Do not modify your NS (Name Server) records during this setup - leaving them as-is ensures your emails won’t be disrupted. Once you’re in the DNS management area, you can proceed with adding the required records.
(function(d,u,ac){var s=d.createElement('script');s.type='text/javascript';s.src='https://a.omappapi.com/app/js/api.min.js';s.async=true;s.dataset.user=u;s.dataset.campaign=ac;d.getElementsByTagName('head')[0].appendChild(s);})(document,372145,'wzqrljsrcet38mumssx2');
Google Workspace DNS Records Configuration Guide
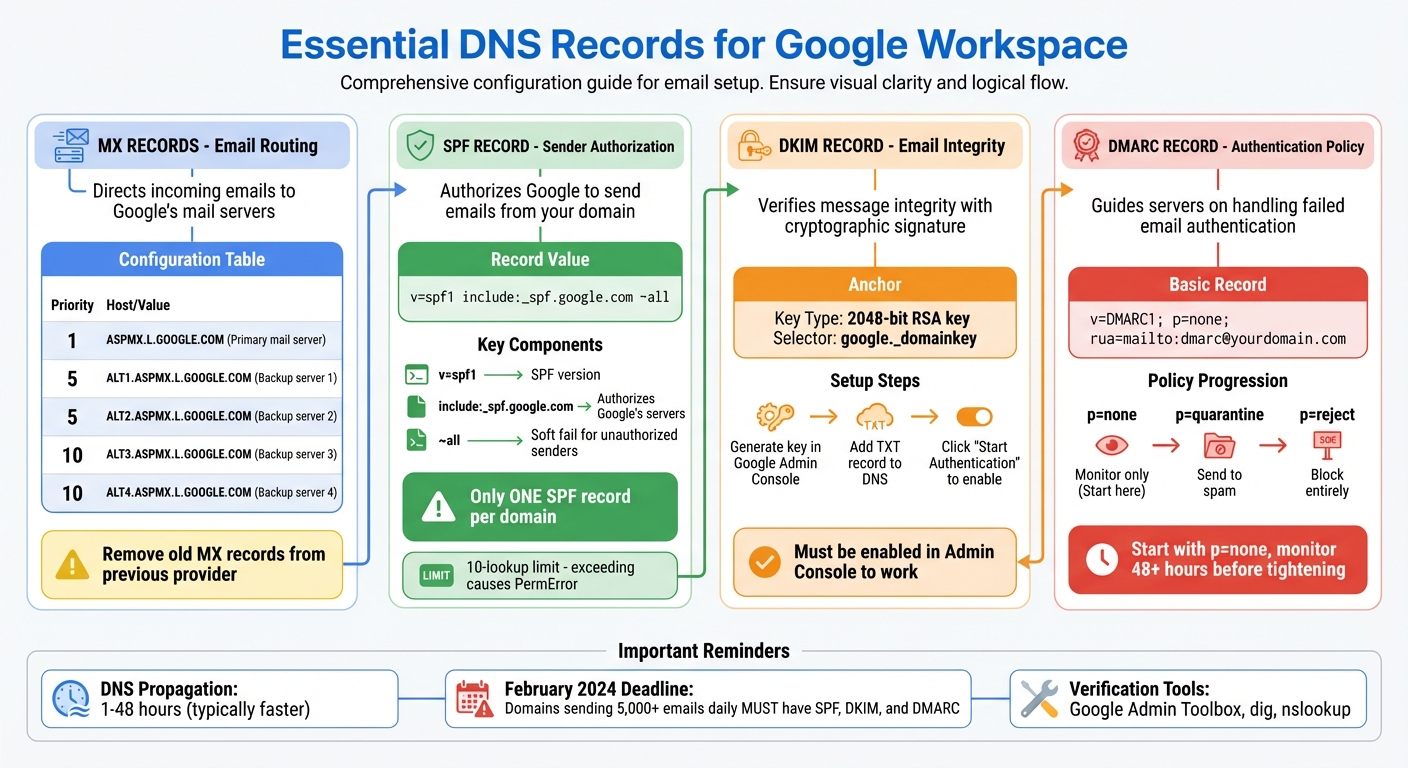
To ensure Google Workspace functions correctly, you'll need to add four specific DNS records to your domain: MX, SPF, DKIM, and DMARC. Each plays a unique role - MX records handle email routing, while SPF, DKIM, and DMARC work together to authenticate and secure your emails.
One key rule to remember: your domain can only have one SPF record. Adding multiple SPF records will cause authentication to fail, leading to emails being flagged as spam or outright rejected. If you're using additional services like Mailchimp or Zendesk, make sure all authorized senders are consolidated into a single SPF record.
Changes to DNS settings aren't immediate. DNS propagation can take anywhere from a few hours to 48 hours, though most updates happen within a few hours. You can use tools like Google’s Admin Toolbox or command-line utilities like dig to confirm your changes are live.
Here’s a breakdown of the essential records for integrating Google Workspace:
| Record Type | Google Workspace Value/Mechanism | Purpose |
|---|---|---|
| MX | ASPMX.L.GOOGLE.COM (Priority: 1) |
Directs incoming emails to Google’s mail servers |
| SPF | v=spf1 include:_spf.google.com ~all |
Authorizes Google to send emails from your domain |
| DKIM | 2048-bit RSA key via google._domainkey |
Verifies message integrity with a cryptographic signature |
| DMARC | Policy record (none/quarantine/reject) | Guides servers on handling failed email authentication |
MX (Mail Exchange) records tell other mail servers where to send emails addressed to your domain. Without properly configured MX records, incoming emails may bounce back to the sender or get lost.
Google Workspace uses ASPMX.L.GOOGLE.COM as the primary mail server, with a priority of 1. Lower priority numbers indicate higher importance. To ensure excellent email deliverability, configure your MX records as follows:
| Priority | Mail Server | Purpose |
|---|---|---|
| 1 | ASPMX.L.GOOGLE.COM | Primary mail server |
| 5 | ALT1.ASPMX.L.GOOGLE.COM | Backup server 1 |
| 5 | ALT2.ASPMX.L.GOOGLE.COM | Backup server 2 |
| 10 | ALT3.ASPMX.L.GOOGLE.COM | Backup server 3 |
| 10 | ALT4.ASPMX.L.GOOGLE.COM | Backup server 4 |
Before adding these, remove any MX records from your previous email provider. Leaving old records active can cause delivery issues, with emails being routed to the wrong servers.
Once you've updated the MX records in your DNS settings, go to the Google Admin Console and click "Activate Gmail" for your domain. This activation step is crucial - your MX records won't work until it's completed.
After setting up MX records, the next step is creating an SPF record to authorize email senders.
SPF (Sender Policy Framework) records help prevent email spoofing by letting receiving servers verify that emails sent from your domain are coming from authorized servers. For Google Workspace, your SPF record should look like this:
v=spf1 include:_spf.google.com ~all
Here’s what each part means:
v=spf1 specifies the SPF version.include:_spf.google.com authorizes Google's servers to send emails on your behalf.~all indicates a soft fail for unauthorized senders.Add this as a TXT record in your DNS settings. Use @ for the Name field (representing your root domain) and paste the SPF value into the Value field. Depending on your DNS provider, you might need to enclose the value in quotation marks - check your provider's documentation for details.
Keep in mind that SPF has a 10-lookup limit. Each include: statement counts as one lookup. If you’re using multiple third-party services, exceeding this limit will result in a "PermError", causing email authentication to fail. Emails from your domain could then be flagged as spam or rejected.
While SPF ensures that only authorized servers can send emails, DKIM adds security by verifying the integrity of your messages.
DKIM (DomainKeys Identified Mail) uses cryptographic signatures to confirm that emails from your domain haven’t been tampered with during transmission. Google generates the private key and stores it on their servers, while you’ll publish the corresponding public key in your DNS records.
To set up DKIM, follow these steps:
google._domainkey.Add this TXT record to your DNS settings. Set the Name field to google._domainkey (or the full hostname if required by your DNS provider). Make sure the entire key is entered without truncation.
Once the record is added, return to the Google Admin Console and click "Start Authentication". Note that simply publishing the record isn’t enough - you must enable DKIM signing to activate it. You can verify the record’s status with a command like:
dig TXT google._domainkey.yourdomain.com
DMARC (Domain-based Message Authentication, Reporting, and Conformance) ties everything together by defining how receiving servers should handle emails that fail SPF or DKIM checks. It also provides reporting to help you monitor unauthorized use of your domain.
A basic DMARC record looks like this:
v=DMARC1; p=none; rua=mailto:[email protected]
Here’s how to add it:
_dmarc.Starting with p=none allows you to collect data without affecting email delivery. Once you’re confident that all legitimate emails are passing authentication, you can move to stricter policies:
p=quarantine sends unauthorized emails to spam.p=reject blocks unauthorized emails entirely.DNS configuration problems - such as duplicate records, syntax errors, or incomplete setups - can wreak havoc on email delivery and authentication.
DNS propagation can take up to 48 hours. During this time, some servers may reflect updated records, while others still rely on outdated configurations. This inconsistency can create temporary issues.
To track propagation, you can use tools like dig or nslookup in the command line. For instance, running dig MX yourdomain.com will show the mail servers currently associated with your domain. Alternatively, third-party tools like Google’s Admin Toolbox or MXToolbox provide a global perspective by querying DNS servers from various regions. If your records look correct in some areas but not others, it’s likely that propagation is still in progress.
It’s a good practice to wait at least 24 hours between DNS changes to allow for full propagation. This waiting period underscores the importance of ensuring your records are accurate before diving into more complex configurations.
Manually entering DNS records can lead to errors, especially when dealing with long DKIM keys or managing multiple domains. Even small mistakes - like an extra space, a missing quotation mark, or duplicate SPF records - can disrupt authentication.
| Record Type | Common Misconfiguration | How to Fix It |
|---|---|---|
| SPF | Multiple TXT records | Combine into one record starting with v=spf1. |
| SPF | Exceeding 10-lookup limit | Simplify by replacing include: statements with ip4: addresses. |
| DKIM | Key not enabled in Admin Console | Go to Apps > Google Workspace > Gmail > Authenticate Email and click "Start Authentication". |
| DMARC | Policy too strict initially | Begin with p=none and monitor reports for at least 48 hours. |
| MX | Conflicting old records | Remove any MX records that don’t point to Google servers. |
For SPF records, each include: statement counts toward the 10-lookup limit. Exceeding this limit can cause authentication failures. If you rely on multiple third-party services, you can "flatten" your SPF record by replacing some include: statements with direct ip4: addresses for those services' mail servers.
To simplify large-scale DNS management, platforms like Primeforge automate the setup process, reducing configuration time to about 30 minutes and minimizing errors from manual input.
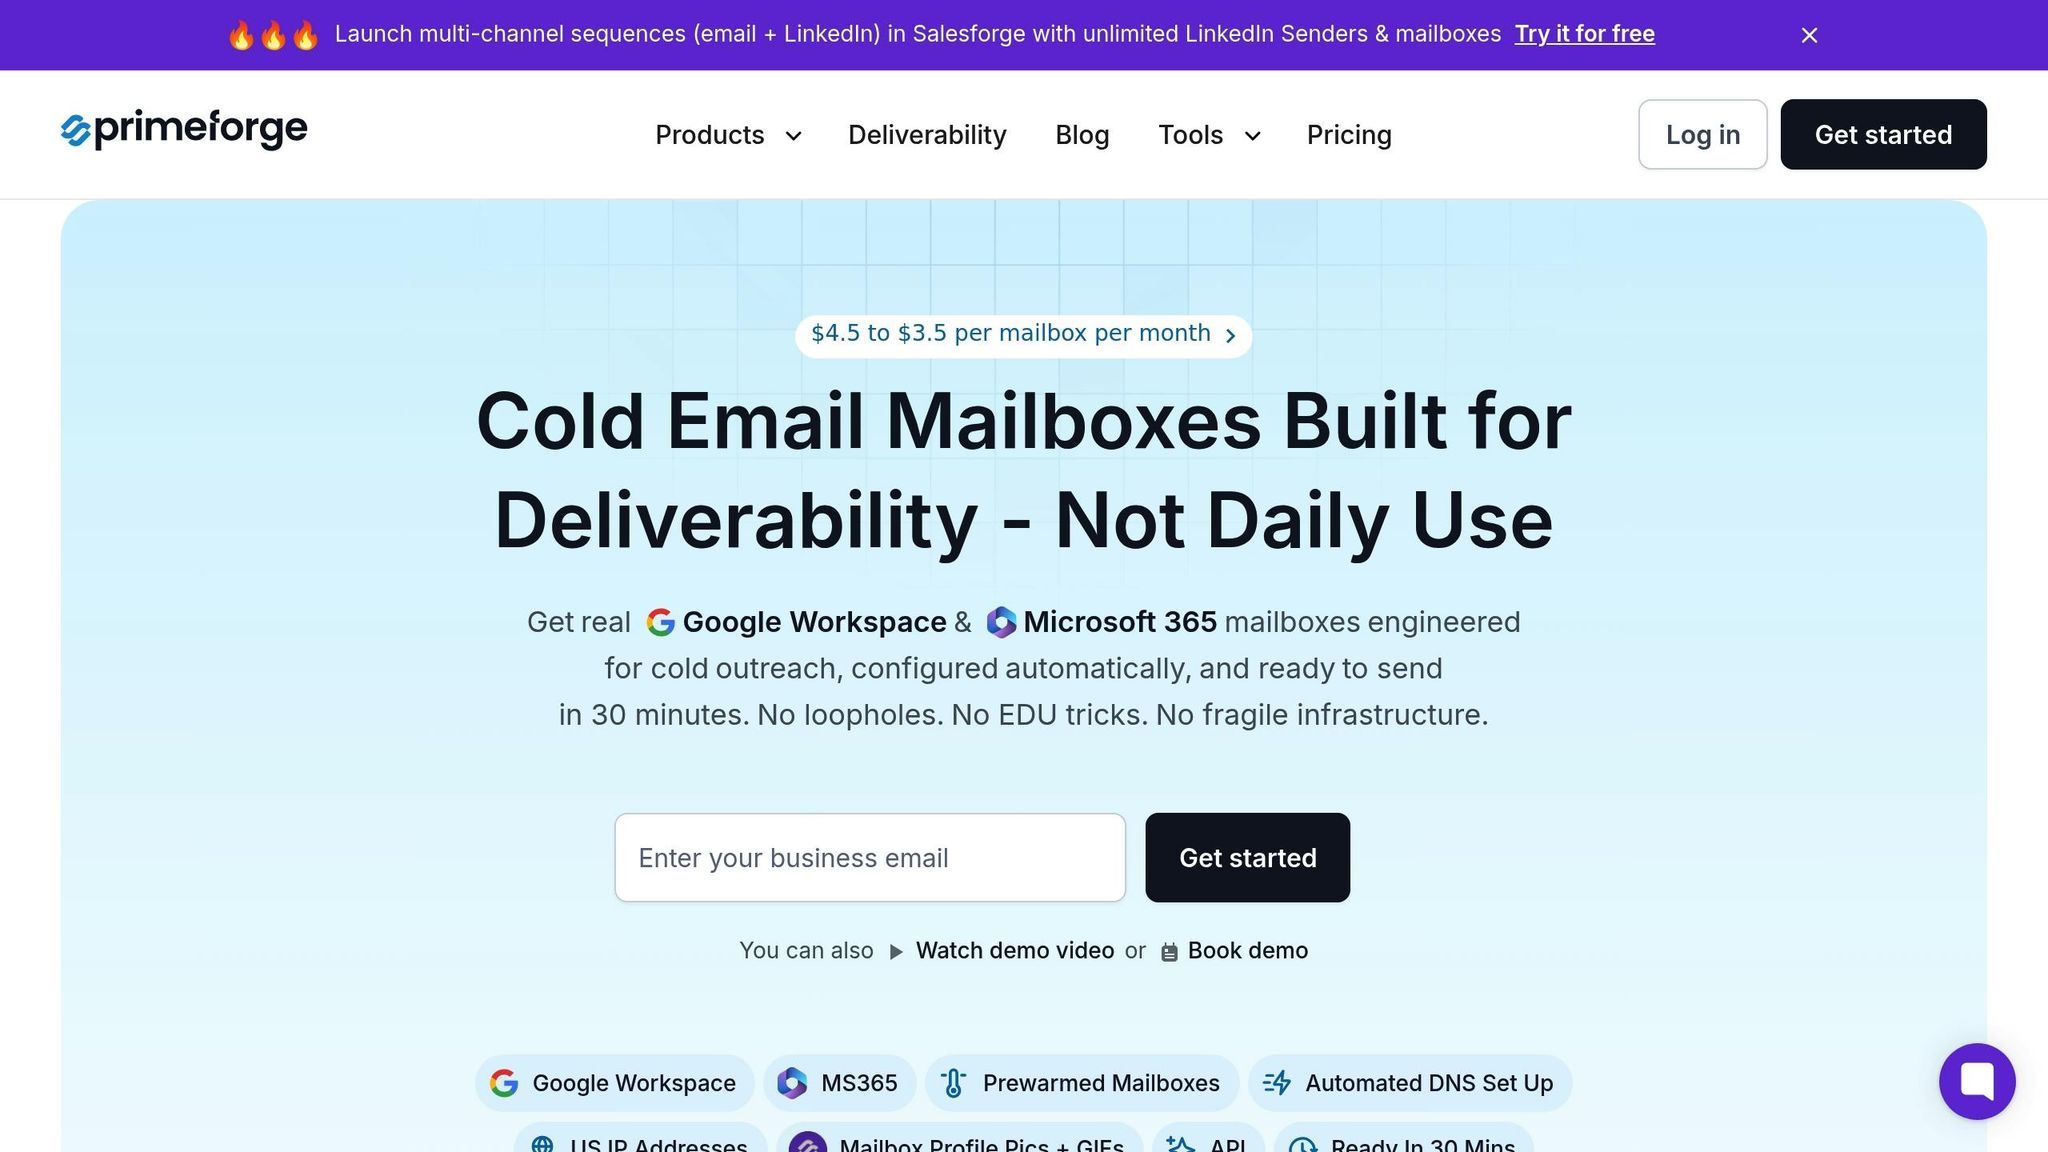
Primeforge simplifies the often tedious task of configuring DNS records for Google Workspace by automating the entire process. Tasks like setting up SPF, DKIM, and DMARC, which typically take 30–60 minutes when done manually, are completed in under 5 minutes using Primeforge. Through API integrations with DNS providers such as Cloudflare and GoDaddy, the platform eliminates the need for manual updates.
The system ensures that Google Workspace–specific configurations are applied correctly. For example, it automatically includes include:_spf.google.com in SPF records and uses the google._domainkey selector for DKIM. This automation not only saves time but also removes the risk of errors when entering long DKIM keys or complex TXT values. Additionally, users can update authentication records for multiple domains simultaneously through a single, user-friendly interface - a major advantage for agencies managing several client accounts.
"Primeforge takes care of all the technical deliverability details - SPF, DKIM, DMARC, domain warm-up, and DNS records." - Dominique W., Verified User in Consulting
But Primeforge doesn’t stop at DNS automation. Its suite of features aims to enhance email deliverability and streamline overall infrastructure management.
Primeforge goes beyond DNS configuration by offering US-based IP addresses, which can improve inbox placement with American email providers like Gmail. Aligning sender reputation with the recipient's location is particularly beneficial for B2B cold email campaigns targeting US markets.
The platform also supports bulk DNS updates, making it easy to manage multiple domains at once and significantly reducing the manual workload. Other features include automated mailbox profile picture uploads, centralized management of multiple Google Workspace accounts, and seamless integration with tools like Salesforge for multi-channel outreach and Warmforge for email warm-up. While these tools require separate subscriptions, they are designed to work together, creating a seamless experience for cold outreach campaigns.
Primeforge’s capabilities are designed to not only save time but also improve email performance across the board.
| Feature | Manual DNS Setup | Primeforge Automated Setup |
|---|---|---|
| Time Required | 30–60 minutes | Under 5 minutes |
| Technical Expertise | High (requires DNS knowledge) | Low (intuitive interface) |
| Error Risk | High (typos, formatting issues) | Minimal (automated validation) |
| Scalability | Limited (individual setup) | High (bulk operations) |
| IP Reputation | Variable/Mixed | Stable, US-based IPs |
DNS configuration plays a critical role in ensuring reliable email delivery for Google Workspace. Errors in these settings can result in bounced emails or messages landing in spam folders. As Google's documentation cautions: "If Gmail is working, don't change your MX records. Doing so could cause incoming email messages to bounce". Correct DNS settings not only safeguard your sender reputation but also help guarantee emails reach their intended inboxes.
Manually setting up DNS can take 24–48 hours per workspace and requires absolute accuracy. A single mistake - like a typo - can disrupt email operations entirely. For agencies managing numerous client domains or businesses handling large-scale cold outreach campaigns, this process can quickly become overwhelming and inefficient.
Automation offers a solution. Primeforge simplifies the process by automating DNS setup, reducing the time needed to just about 30 minutes. The platform handles MX, SPF, DKIM, and DMARC configuration, validates records, and even supports bulk updates for multiple domains. With US-based IP addresses and pricing starting at $3.50–$4.50 per mailbox, it combines technical reliability with cost-effective options.
Ultimately, businesses face a choice: stick with error-prone manual setups or embrace the speed and accuracy of automation. Precision in DNS configuration is the key to ensuring emails land where they’re supposed to - your recipient's inbox, not their spam folder.
Setting up SPF, DKIM, and DMARC for Google Workspace is a must if you want to protect your email communications. These DNS records work together to verify your emails, making it harder for bad actors to spoof your domain or launch phishing attacks. Plus, they help maintain your domain’s reputation, which is crucial for email reliability.
When configured correctly, these records improve email deliverability, ensuring your messages end up in inboxes instead of being flagged as spam. This is especially important for activities like cold outreach or sending high volumes of emails, where maintaining trust and ensuring your messages reach the right people is key. By setting up SPF, DKIM, and DMARC, you’re building a solid and secure email infrastructure.
Primeforge takes the hassle out of DNS configuration by automating the process for managing multiple domains. Thanks to its bulk-update engine, you can apply SPF, DKIM, DMARC, and MX records to dozens - or even hundreds - of domains with just a single click or API call. This eliminates the tedious work of updating records manually for each domain.
When setting up a new Google Workspace mailbox, Primeforge automatically generates and applies the required DNS records across all connected domains. This means you won’t have to log in to individual registrars to handle these changes. Through its centralized dashboard, you can also rotate DKIM keys, track verification statuses, and enforce consistent policies across every domain, significantly cutting down setup time while reducing the likelihood of errors.
For teams managing multiple Google Workspace accounts, this level of automation allows for rapid scaling without driving up costs. By ensuring DNS settings are accurate from the beginning, Primeforge not only simplifies domain management but also helps maintain strong email deliverability and safeguards your domain's reputation.
When configuring DNS records for Google Workspace, getting SPF, DKIM, DMARC, and MX records right is absolutely essential. Errors like typos, missing details, or improper setups can cause serious headaches - emails might get flagged as spam, rejected altogether, or worse, your domain could be exposed to phishing attacks.
Some common pitfalls? Duplicate or incorrect SPF records are a big one. Forgetting to include include:_spf.google.com or exceeding the 10-lookup limit can cause issues. Similarly, DKIM mistakes - like using the wrong selector or failing to enable DKIM in the Admin console - can lead to problems. And when it comes to DMARC, jumping straight to a strict policy (p=reject) without proper testing can block legitimate emails. Starting cautiously with p=none for monitoring is a much safer approach. For MX records, double-check that all Google-provided hosts are added with the correct priority, and don’t forget to clean out any outdated entries.
Primeforge takes the hassle out of this process by automating DNS configuration. It ensures your records are accurate and up-to-date, helping you avoid these common errors. The result? You save time, protect your domain’s reputation, and keep your email deliverability on track.
