If you want to send cold emails at scale, you can’t just use your main domain and start sending. That will land you in spam.
What you need is a proper cold email infrastructure. This means:
The problem is, doing all this manually takes a lot of time. Once you add more domains and mailboxes, it gets even harder to manage.
That’s why the best approach is to set it up once and let it run on autopilot.
In this guide, I’ll show you the steps to build cold email infrastructure the right way, and how you can automate it so you can scale safely without extra effort.
Cold email infrastructure is the technical setup that makes sure your cold emails reach inboxes safely.
It protects your main domain, builds trust with email providers, and helps you scale outreach without landing in spam.
Here’s how it works:
In short, cold email infrastructure is what keeps your outreach safe, verified, and scalable, so your emails land in inboxes, not spam.
5 Most Popular Cold Email Infrastructure Tools in 2025
Setting up cold email infrastructure may sound technical, but it follows a few clear steps. Once these are in place, you can send emails safely and prepare for scaling on autopilot.
You should never send cold emails from your main domain. If it gets flagged, your brand reputation is at risk.
Here’s what to do:
After buying your domains, you must prove that your emails are real and safe. This is done by adding three DNS records: SPF, DKIM, and DMARC.
These records help inbox providers trust your emails and stop them from going to spam.
When an email is received, the inbox checks this list. If the sender isn’t approved, the email is marked as spam. SPF also prevents others from faking your domain name.
Without DKIM, your emails may not be trusted and can land in spam.
DMARC also sends you reports showing who is sending emails from your domain, so you can spot fake senders and protect your reputation.
Setting all this up manually takes time and technical skill, especially across multiple domains.
With Primeforge, it’s done automatically:
This ensures your cold email domains are fully authenticated and your emails reach inboxes, not spam.
Once domains are ready, create multiple mailboxes on each domain. These are the inboxes you’ll send from.
Here’s how warm-up works:
With Infraforge, you don’t need to do anything manually. They create new mailboxes, connect them to mail services, and warm them up automatically.
Each mailbox sends and replies to real emails in the background until it’s fully ready for cold outreach.
After your mailboxes are created and warmed up, the next step is to connect them to your outreach platform so you can start sending emails.
Here’s how it works:
This completes your cold email infrastructure, everything is connected, trusted, and ready for safe sending.
Even after setup, you need to check if your emails are landing in your inbox.
Key checks:
This helps you fix problems early before they affect results.
Setting up cold email infrastructure manually takes several hours for setup and a few weeks for warm-up.
Here’s the breakdown:
Skipping the warm-up phase is risky, new mailboxes without reputation often land in spam or get flagged by Gmail or Outlook, which can ruin your domain reputation before you even start outreach.
For a basic setup (1 domain, 2 mailboxes), expect around 3–4 hours of manual setup and 2–3 weeks of warm-up.
For a scalable setup (3–5 domains, 10+ mailboxes), it can take 8–10 hours or a full day to configure everything, plus the same 2–3 weeks of warm-up before safely sending campaigns.
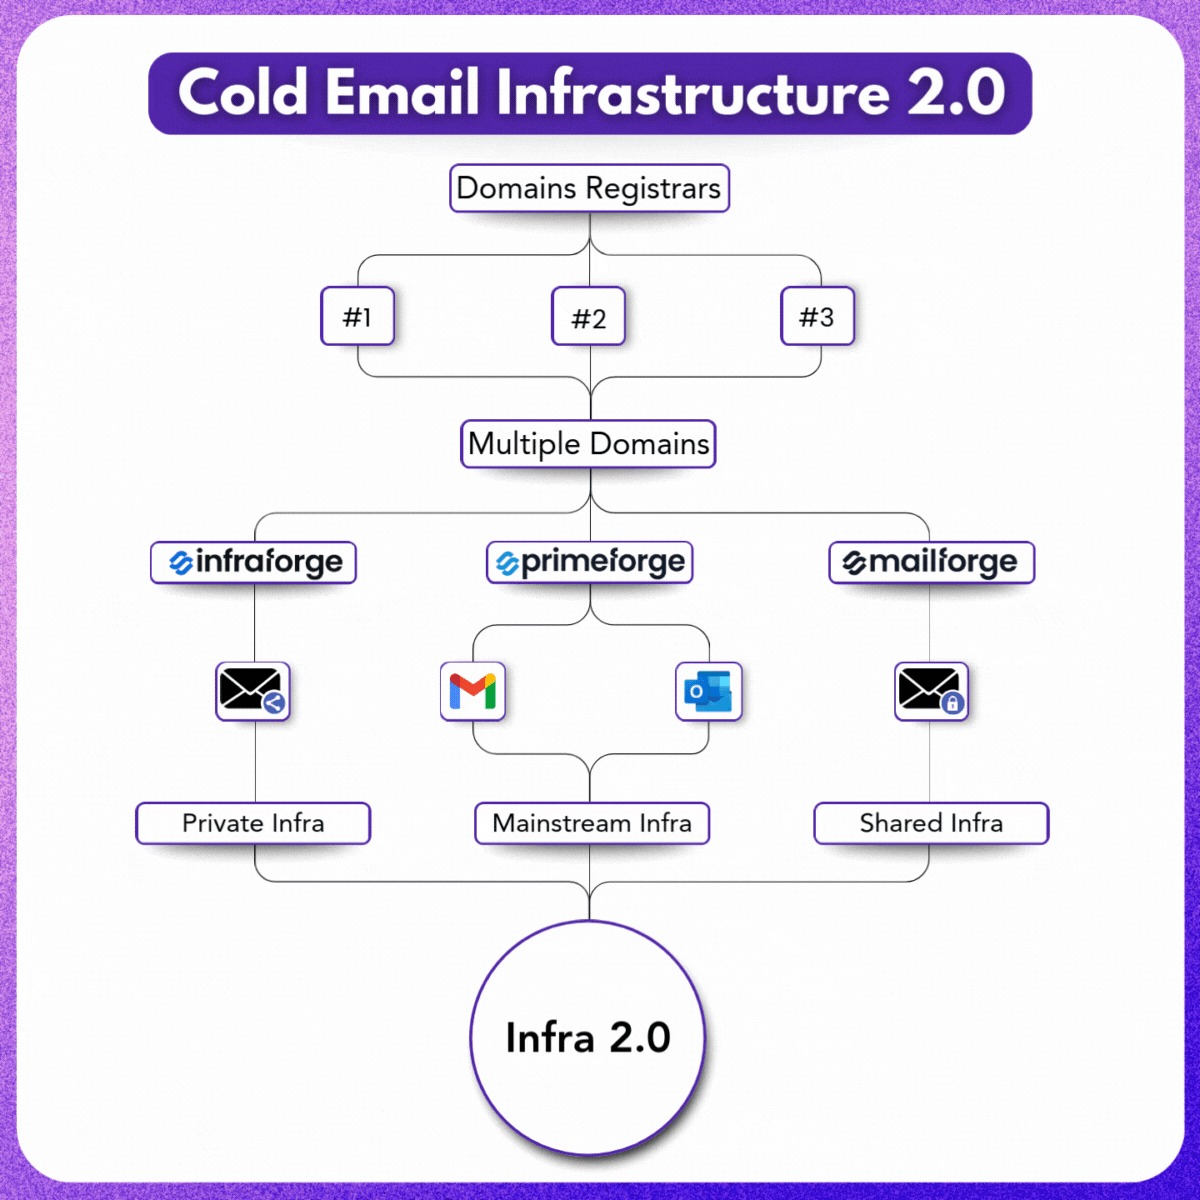
Scaling cold email safely starts with the right infrastructure that takes care of domains, DNS, mailboxes, and deliverability automatically.
With the Forge Stack, you can automate the entire process to send cold emails. Here’s how the recommended setup works:
Our recommendation:
Use Primeforge together with either Infraforge or Mailforge, this combination gives you both safety and scalability.
You get private or shared domains, mainstream mailboxes, automated DNS setup, and 24/7 deliverability monitoring, all ready in minutes.
You can also watch a quick video explaining the difference between Primeforge, Mailforge, and Infraforge: Primeforge VS Infraforge VS Mailforge
This is how the Forge Stack builds cold email infrastructure that scales, not just setup, but a system that runs, protects, and grows with your outreach automatically.
A proper cold email setup is what makes scaling safe and consistent.
Buy outreach domains, set up SPF/DKIM/DMARC, warm up mailboxes, connect them to your outreach tool, and keep monitoring deliverability as you grow.
If you’re planning to send at scale, spread your setup smartly.
Get your outreach domains from Mailforge or Infraforge, and diversify by provisioning Google and Microsoft inboxes from Primeforge for better inbox placement.
Keep your warm-ups and health tracking running through Warmforge so your domains stay healthy as you scale.
Once everything’s in place, connect it to any outreach platform you prefer, and your infrastructure will keep running safely, ready to send thousands of cold emails.
